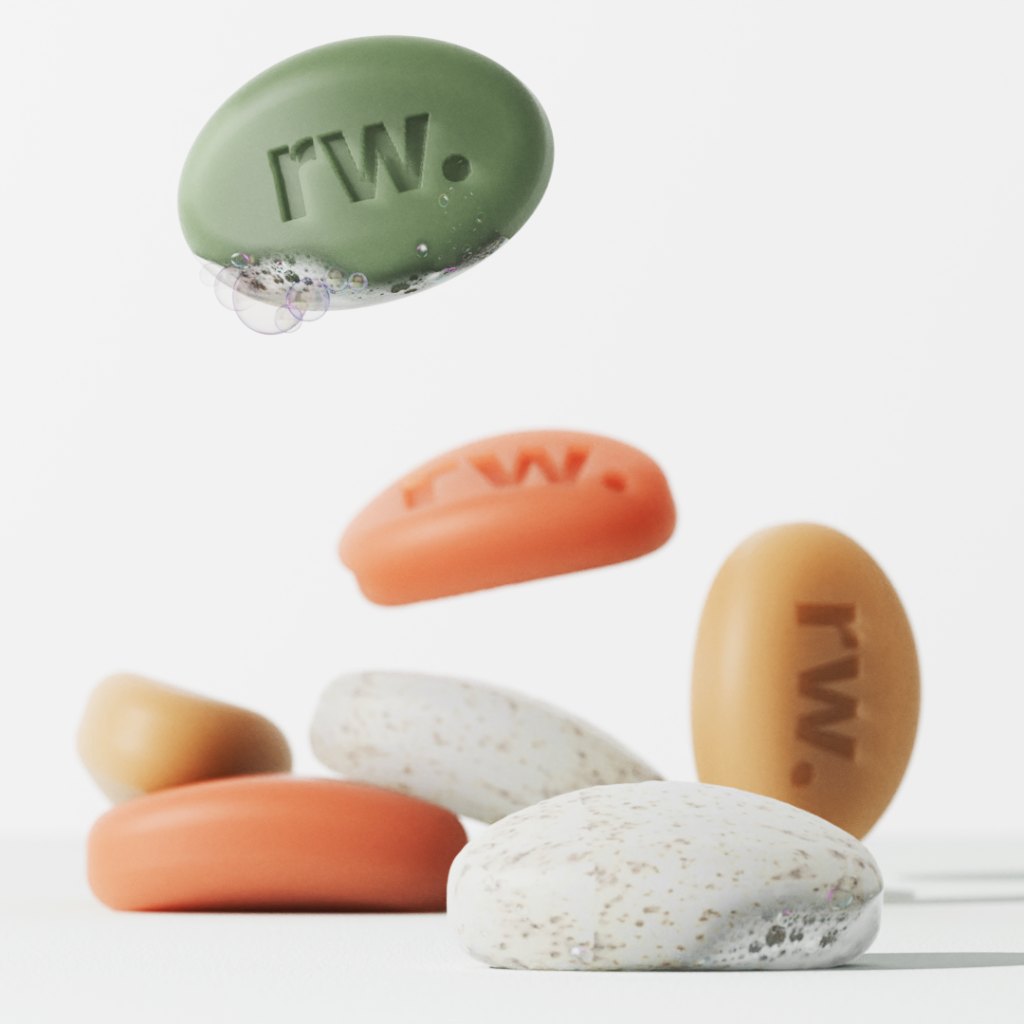
Render Soap Material in KeyShot
In this tutorial, I will show you step by step how I created Soap material in KeyShot.
Step 1: Prepare the Scene
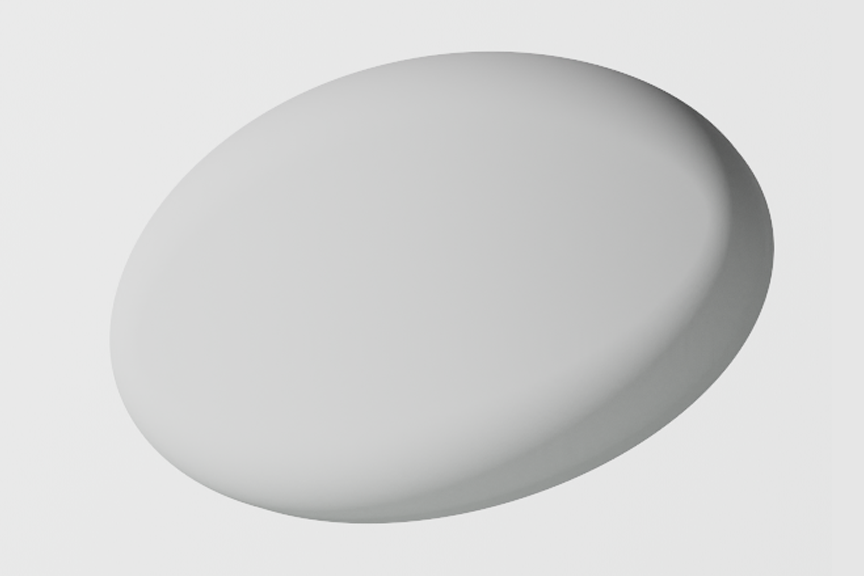
Import your Soap 3D model into Keyshot and add a ground plane and then, adjust the composition and the Lighting. Take into account that the edges of the soap bar must be rounded, so add fillets everywhere in your model!
*Tip: If you don’t have a 3D model you can use a Rounded Cube from the Models library and scale it in the different axis.
Step 2: Change Material Type
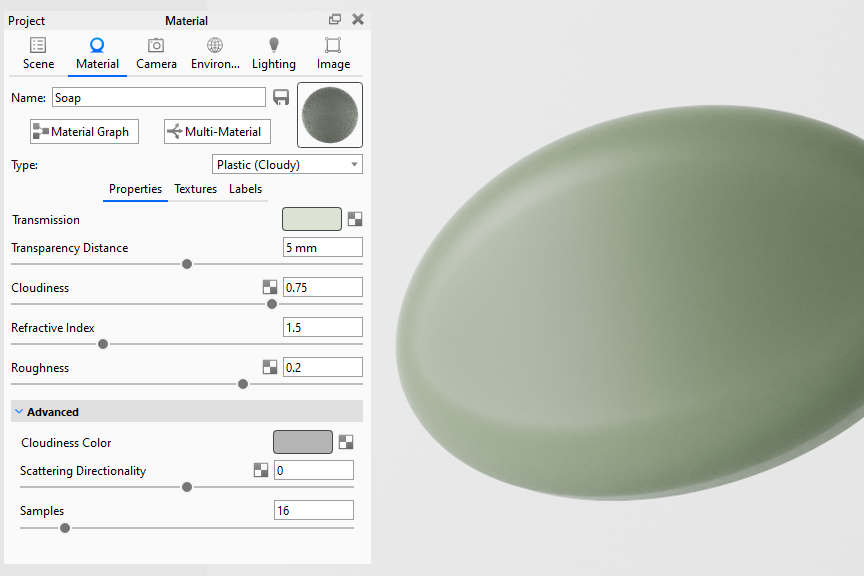
Change the material to Plastic (Cloudy). After that, change the Transmission values to the following ones:
- Transparency distance: 5mm
- Cloudiness: 0.75
- Roughness: 0.2
Then choose the colour that you like for your soap bar.
Step 3: Add Bump
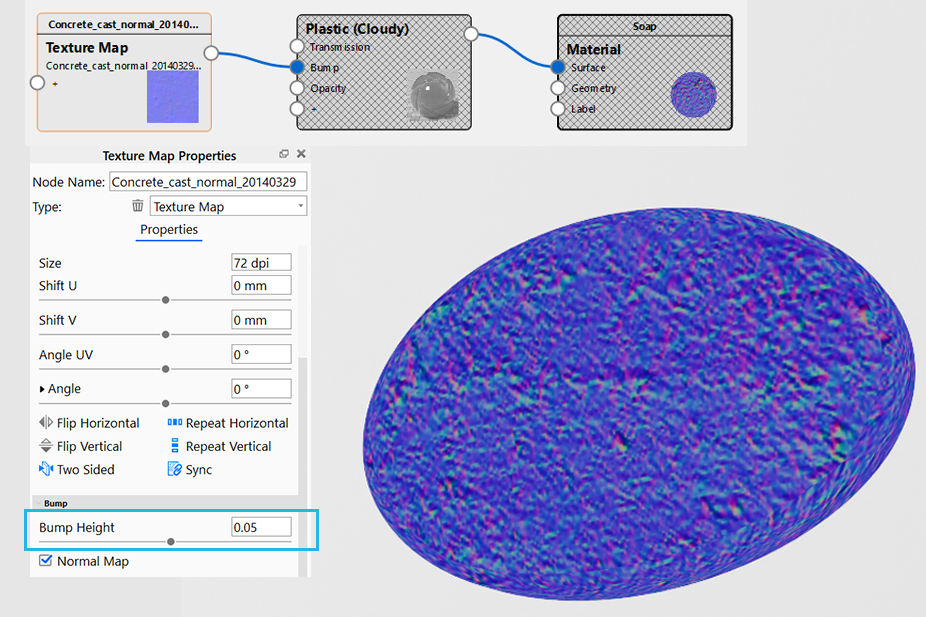
Go to the Material Graph tab and add the Concrete Cast Normal texture from the Textures library (or any other similar) and add it to the Bump node.
In the Texture Map Properties, reduce the Bump Height to 0.05.
*Tip: If you want to visualize the size of your texture double click on the Texture Map box and the click “C”.
Step 4: Emboss the Logo
Add a Displace node to the Geometry with your brand logo. Change the Mapping Type to Planar and adjust the position of the logo.
*Tip: Select the Texture Map and click “C” to see its position.
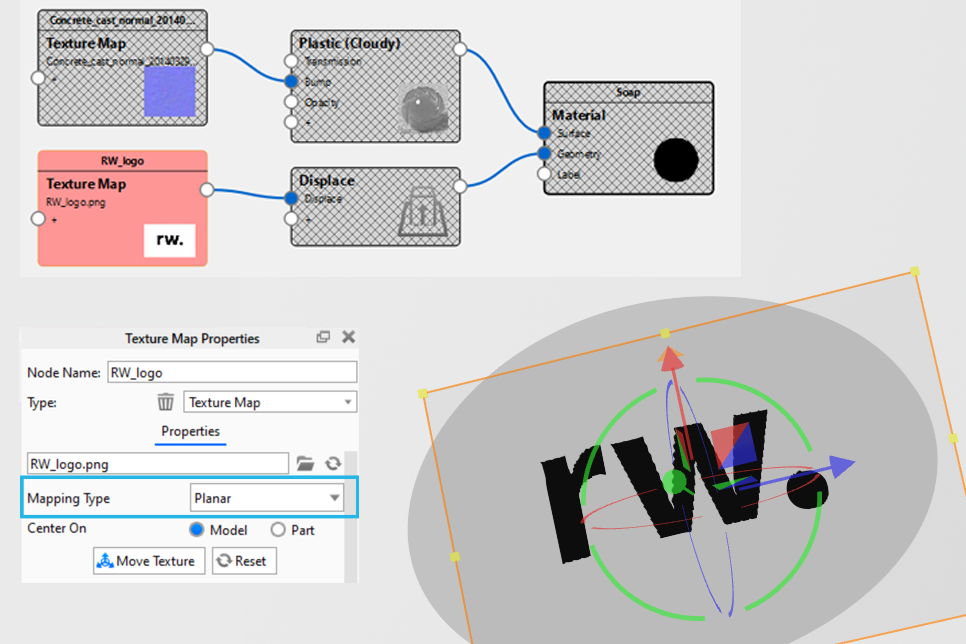
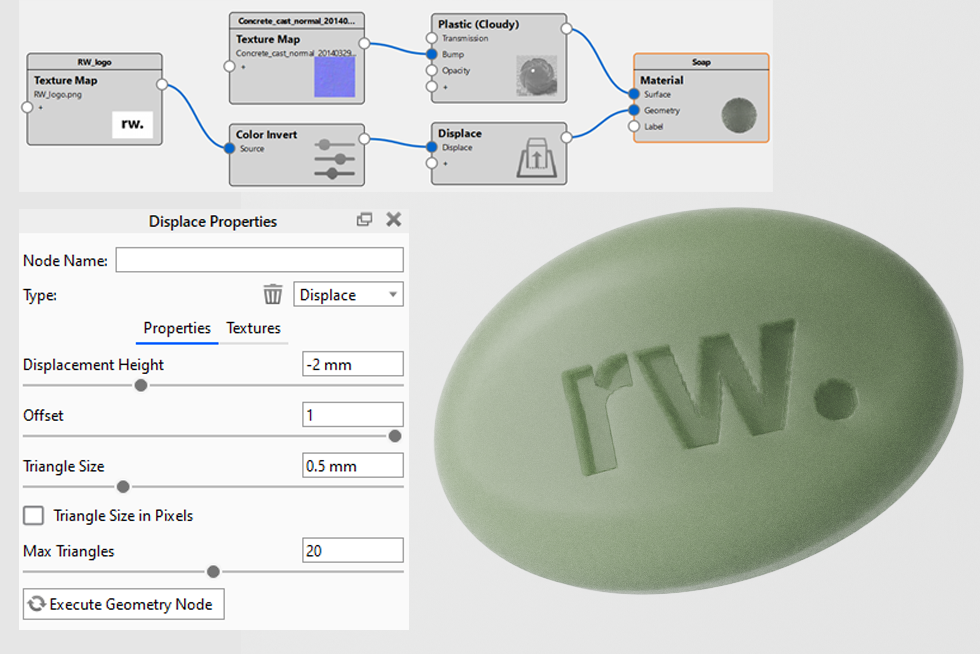
Then, change the Displacement properties and Execute the Geometry Node. Set a negative value for the Displacement Height to emboss the logo.
*Tip: Take into account that the white areas of the image are displaced and the black ones won’t, so you can add a Color Invert node if your image has the logo in black.
Step 5: Add Bubbles
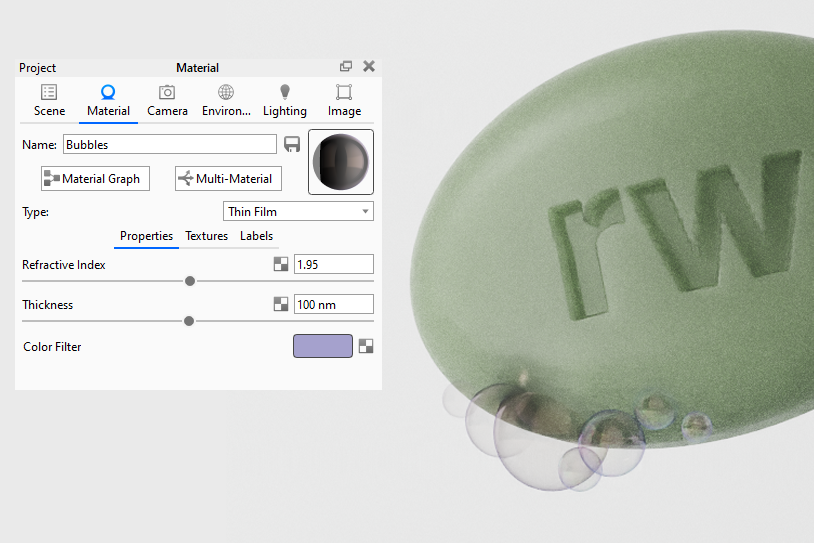
Add Spheres from the Models library and change the material type of them to Thin Film.
Change the properties to the following values:
- Refractive Index: 1.95
- Thickness: 100 nm
Use a purple Color Filter to give it a more realistic effect.
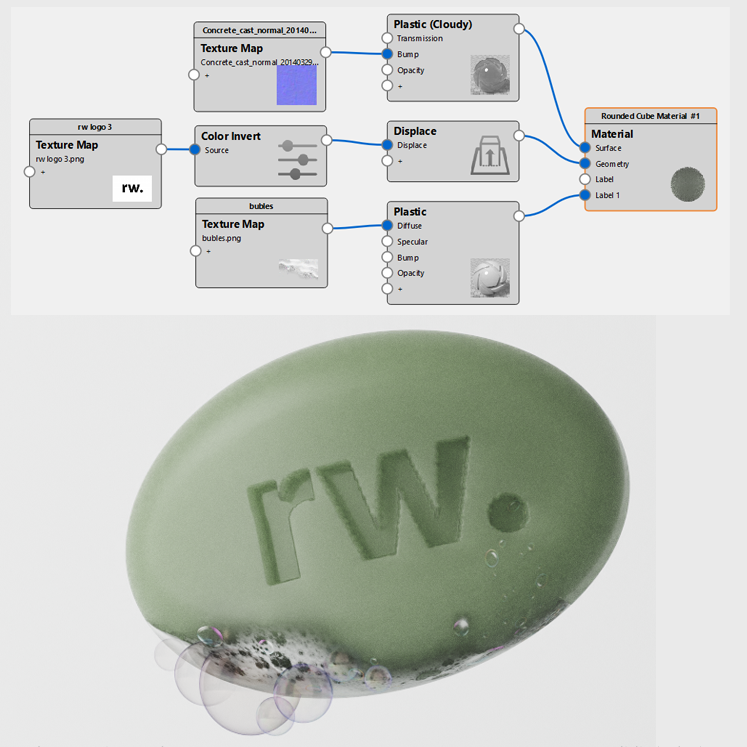
To increase the bubbles effect you can also add a Texture as a Label in the Soap material. Use a .png texture of foam and move the texture until it fits in your model.
I hope you find this tutorial useful!
